
EARS · ILLUSTRATED 3D RECOVERY
Earlobe Keloid Excision: before & after and recovery stages
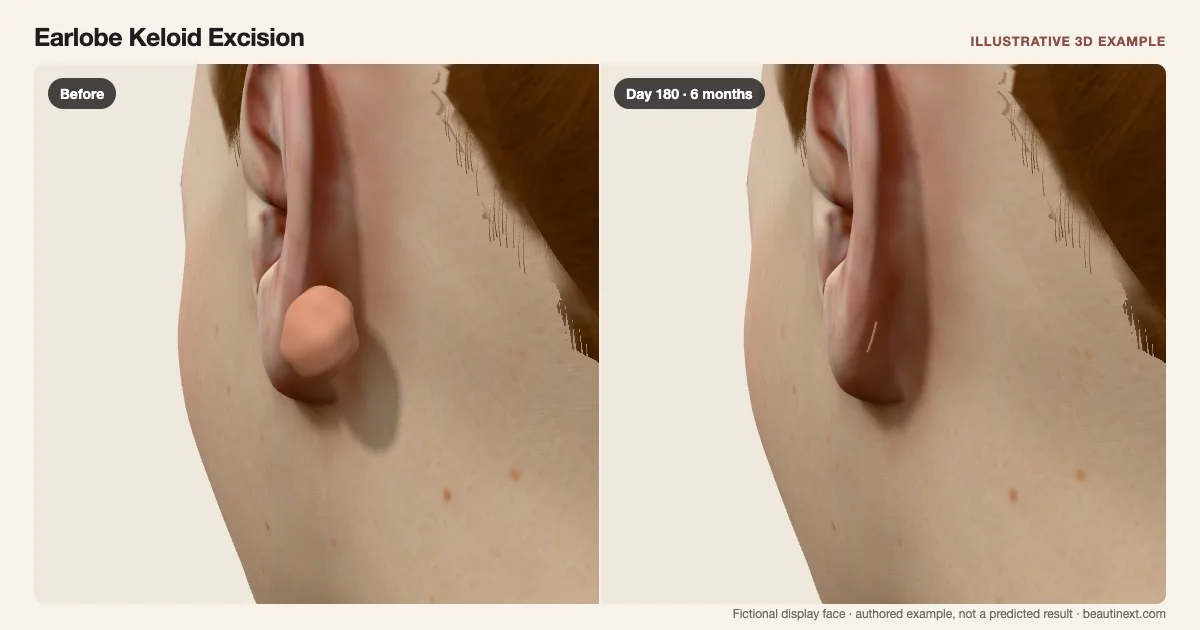
Compare a raised lump behind the right earlobe with its closed excision scar. Rotate the ear to inspect the back.
SUMMARY
What this example shows
A fictional lump on the back of the right earlobe is removed, leaving a closed scar with early stitches and local fullness. The optional pressure earring shows its position only; it does not change recovery or predict recurrence. Dates and scar size are illustrative.
STAGE BY STAGE
Earlobe Keloid Excision recovery stages
Raised earlobe reference
A fictional lobulated mass sits on the back of the right earlobe.
Its size and location are an example, not an individual diagnosis.
First few days: Closure and stitches
The mass is gone; small stitches cross a line with temporary local fullness.
Closure details are illustrative. General earlobe-repair guidance informs the early closure, not a keloid-specific prediction.
Around 2 weeks: Closed scar remains
Stitches are no longer shown and local fullness is smaller.
The example hides stitches on day 10, not an instruction for removal or pressure-device use.
Around 6 months: Residual scar example
A faint posterior line remains in this course.
A flatter scar does not establish permanent clearance; keloids may grow again.
TIMELINE
Day-by-day checkpoints in the 3D model
The simulator interpolates between these authored checkpoints. They describe the illustration, not measured clinical averages.
A fictional lobulated mass sits on the back of the right earlobe.
The raised lump is replaced by a closed line and temporary local fullness.
Stitches remain while local fullness and color ease.
The same line remains beneath the small stitches.
The authored stitch change is not a removal schedule.
Less temporary fullness reveals the closed lobe surface.
A colored line remains after the initial response.
The line becomes subtler in this illustrative course.
A faint scar remains; the view does not predict lasting clearance or recurrence.
INDIVIDUAL DIFFERENCES
How recovery can vary
Timing and response
The model shows one closed-surface course. Scar size, closure, pigment and recurrence vary; face and skin-tone choices do not calculate risk.
Longer term
Keloid care often combines treatments. The optional pressure earring illustrates placement only, not pressure, fit, wear schedule or treatment effect.
EVIDENCE NOTES
Sources and limitations
- NHS: Keloids and residual scars
Keloids extend beyond the original wound and treatment aims to improve a remaining scar. The fictional cheek shape is not a diagnosis.
- AAD: Keloid surgery and recurrence
Excision removes the keloid, but regrowth is possible and treatment is commonly combined. It does not establish this example’s recurrence date, size or individual likelihood.
- Cleveland Clinic: Split earlobe repair and recovery
Closure with fine stitches, temporary swelling or bruising and a small residual scar. It does not calibrate the displayed cleft, color or dates.
KEEP COMPARING
Other ears examples
This illustration is not medical advice, diagnosis, a treatment recommendation or a prediction of personal results. Swelling, color, contour and dates are authored examples on a fictional face. BeautiNext is not a clinic; your treating team’s assessment and written recovery plan take priority.