
NOSE · ILLUSTRATED 3D RECOVERY
Nasal Bridge Augmentation (Surgery): before & after and recovery stages
Compare a lower starting bridge with surgical augmentation as temporary swelling settles.
SUMMARY
What this example shows
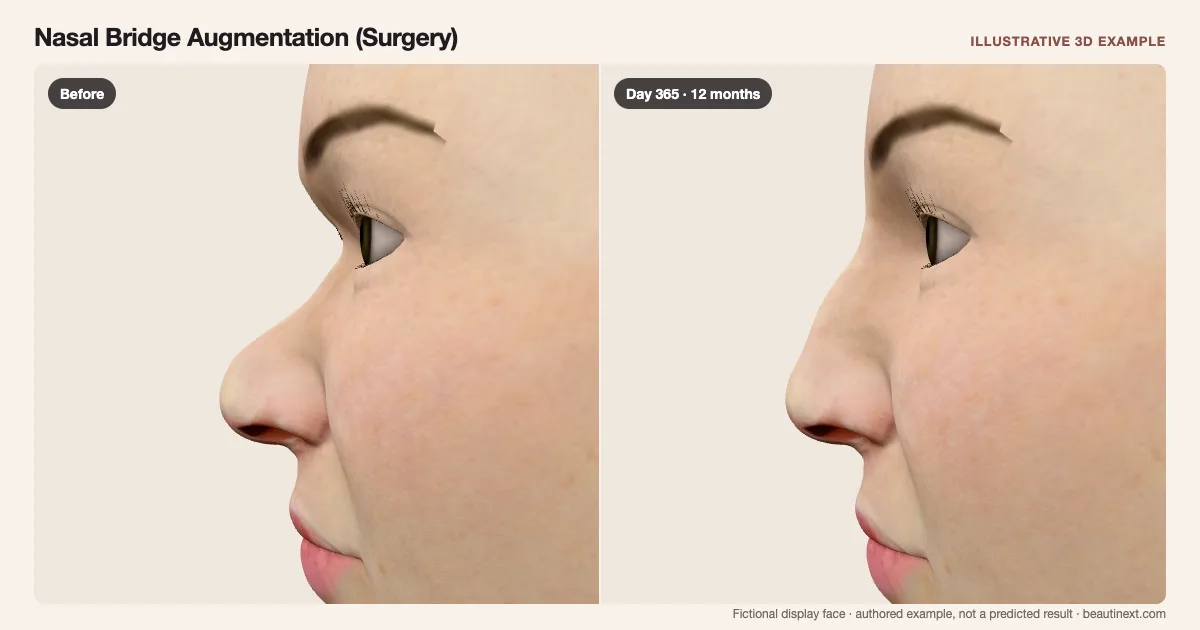
A fixed fictional lower bridge provides the reference. Surgical augmentation raises the bridge surface while early swelling and under-eye bruising settle on separate tracks. The later tip and alar width stay fixed. The surface example does not select a graft or implant, calculate height in millimeters, reconstruct donor healing or assess structural support and breathing.
STAGE BY STAGE
Nasal Bridge Augmentation (Surgery) recovery stages
Lower bridge reference
The same fictional lower bridge is retained beneath every stage.
This reference is authored for comparison and is not inferred from the selected regional face.
First few days: External support and fullness
An optional splint covers the bridge while under-eye bruising and nasal swelling remain visible.
Turn off the dressing to inspect the surface. Removal timing follows the surgical team, not the animation.
Around 1 month: Raised contour emerging
Early color has faded in the example, with some fullness over the added bridge contour.
Less visible swelling does not establish the final contour or graft stability.
Around 1 year: Later profile comparison
The bridge stays higher than the fixed reference after the illustrative swelling clears.
Refinement can take many months; this endpoint is not a promised completion date.
TIMELINE
Day-by-day checkpoints in the 3D model
The simulator interpolates between these authored checkpoints. They describe the illustration, not measured clinical averages.
The same fictional lower bridge is retained beneath every stage.
An optional external splint covers the augmented bridge; early fullness overlaps the new contour.
The bridge is fuller and under-eye color is stronger in this illustrative course.
The splint is hidden at this checkpoint while nasal swelling remains.
Discoloration fades before the remaining bridge fullness.
The raised bridge remains as temporary fullness recedes.
Some residual fullness remains in this authored example.
The bridge is easier to compare with its fixed lower reference.
The added contour remains. This endpoint does not predict graft stability or a personal completion date.
INDIVIDUAL DIFFERENCES
How recovery can vary
Timing and response
The graft or implant, approach, starting tissues and any combined tip work affect recovery. This isolated bridge example keeps the later tip and alar width fixed; it does not choose a surgical material or height.
Longer term
The surface cannot assess donor-site recovery, graft resorption or warping, implant position, airway function or revision needs. An individual plan and follow-up remain separate from this display.
EVIDENCE NOTES
Sources and limitations
- NHS: Nose reshaping and augmentation
Grafts can build up the nose; early splinting, swelling and bruising differ from later settling. The source does not measure this example’s bridge height or stage weights.
- ASPS: Rhinoplasty recovery
Early swelling, splints and longer-term refinement.
KEEP COMPARING
Other nose examples
- Rhinoplasty
- Alar Base Reduction (Nostril Width)
- Revision Rhinoplasty (Tip Deviation)
- Thread Lift (Nose Tip)
- Revision Rhinoplasty (Saddle Dorsum)
- Revision Rhinoplasty (Over-Rotated Tip)
- Revision Rhinoplasty (Alar Retraction)
- Structural Rhinoplasty (Tip Support)
- Nasal Tip Refinement
- Dorsal Hump Reduction
- Nasal Osteotomy (Bridge Narrowing)
- Nonsurgical Rhinoplasty (Filler)
- Bunny Line Botox (Anti-Wrinkle Injections)
This illustration is not medical advice, diagnosis, a treatment recommendation or a prediction of personal results. Swelling, color, contour and dates are authored examples on a fictional face. BeautiNext is not a clinic; your treating team’s assessment and written recovery plan take priority.